
Dump Trailer Maintenance Checklist: Hydraulic, Electrical & Structural Inspection Guide
Master your dump trailer maintenance with this complete guide covering hydraulic pumps, cylinder care, electrical circuits, running gear, and structural safety.

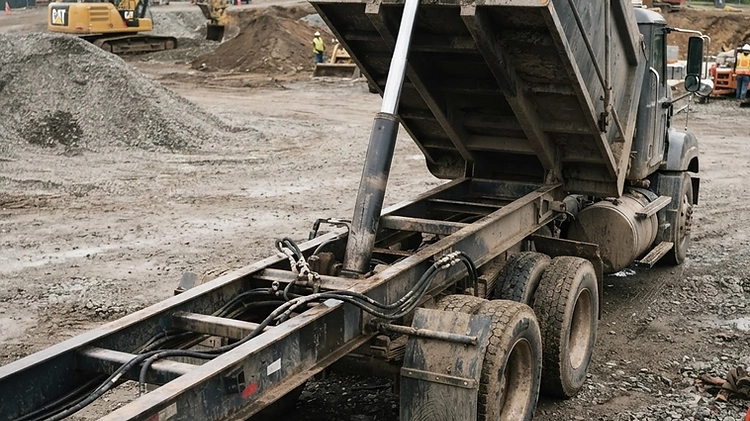
A commercial dump trailer is one of the hardest-working assets in any fleet, hauling crushing payloads of gravel, demolition debris, and heavy equipment day after day. When your hydraulic hoist or electric brakes fail under load, the downtime can cost thousands of dollars in delayed jobs, emergency roadside repairs, and safety liabilities. Implementing a methodical preventive maintenance program keeps your equipment operating safely, preserves resale value, and ensures your trailer dumps smoothly every single cycle.
Whether you operate a heavy-duty gooseneck hauler or a compact tandem-axle rig, dump trailers subject their running gear, electronics, and structural frames to extreme torsional stress. This comprehensive checklist provides professional technicians and owner-operators with actionable inspection schedules, fluid specifications, troubleshooting steps, and mechanical best practices.
The Hydraulic Power Unit and Hoist System
The hydraulic hoist system operates under immense pressures—often exceeding 3,000 PSI—to lift thousands of pounds of material in seconds. Neglecting your hydraulic pump, fluid reservoir, and cylinder seals is the quickest way to end up with a fully loaded bed stuck in the air at a jobsite.

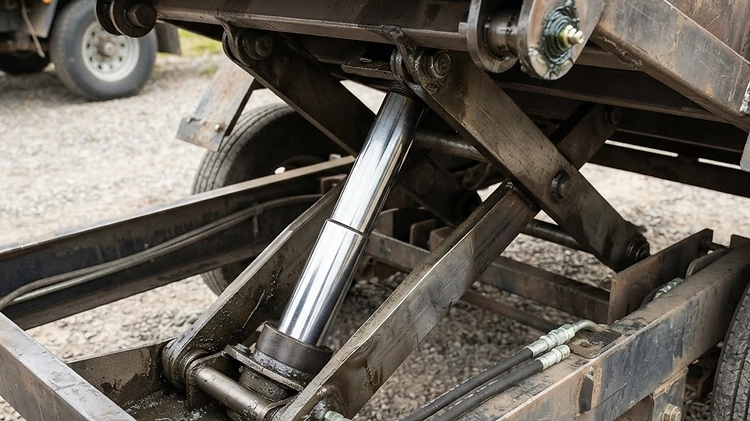
Routine fluid health is paramount. Always check the hydraulic fluid reservoir when the dump bed is fully lowered. If you inspect the reservoir with the cylinder extended, fluid levels will read artificially low, leading to overfilling and messy reservoir venting when lowered. Use a premium ISO VG 32 or ISO VG 46 anti-wear hydraulic oil, or manufacturer-recommended automatic transmission fluid (ATF like Dexron III/Mercon) for colder climates where fluid viscosity must remain low to prevent pump cavitation. Drain and replace the hydraulic oil annually, or whenever the fluid appears milky or discolored from water and dirt intrusion.
Inspect the cylinder rod for deep scoring, pitting, or rust flakes. Even minor burrs on the chrome plating will tear the polyurethane rod wipers and internal pressure seals, resulting in fluid bypass. If your dump bed begins "drifting" down slowly while raised, a leaking internal cylinder seal or a failing check valve is allowing fluid to slip past the high-pressure chamber. Test all hydraulic hoses for outer jacket cracking, wire braid exposure, and blistering near crimp fittings. SAE ORB and JIC fittings should be inspected for weeping and torqued to manufacturer specifications.
Battery Maintenance, Solenoids, and Charging Systems
A surprising percentage of hydraulic lift failures have nothing to do with mechanical pumps—they trace directly to insufficient electrical voltage. Hydraulic dump pumps pull upwards of 150 to 200 amps during peak lift strokes, placing an intense load on the onboard 12-volt deep-cycle battery.

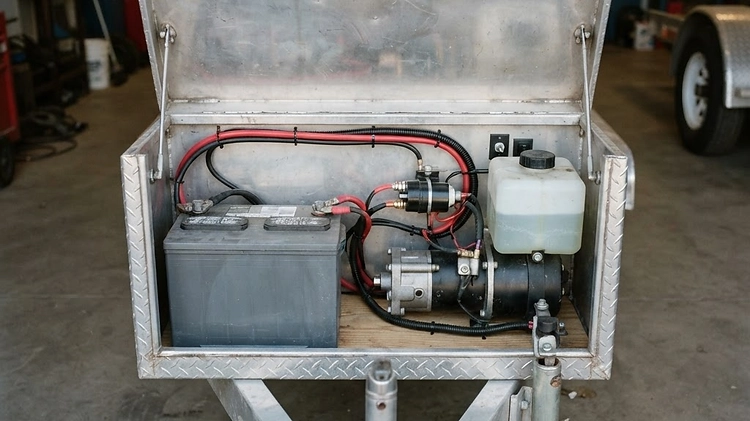
Clean the battery terminals monthly using a wire terminal brush and apply dielectric grease or terminal protector spray to inhibit corrosion. Test battery voltage under both resting and load conditions using a digital multimeter. A fully charged resting battery should register at least 12.6 volts; anything below 12.2 volts indicates a depleted or sulfated battery that cannot supply the surge amperage required by the starter solenoid.
Verify that your auxiliary 12V+ charge circuit pin on your tow vehicle's 7-way round plug is actively delivering charging current while the truck engine runs. Because standard 7-way trickle wires often carry low amperage over long distances, high-demand commercial operators should install an onboard AC shore-power trickle charger or an integrated solar panel kit on the tongue toolbox. Inspect the pump starter solenoid for scorched contacts or melted posts. If you hear a rapid clicking sound when pressing the pendant remote but the pump motor fails to spin, inspect the battery ground cable where it attaches to the trailer chassis—road vibration and frame paint frequently create high-resistance ground faults.
Running Gear: Axles, Brakes, and Suspension Systems
Dump trailers haul dense bulk aggregate, putting substantial weight over the axles and running gear. Routine maintenance on your braking assemblies and suspension components ensures stability on highways and compliance with commercial DOT standards.
Every 12,000 miles or 12 months, pull your wheel hubs to inspect, clean, and repack the wheel bearings with high-temperature NLGI No. 2 wheel bearing grease. Even if your trailer features EZ-Lube style axle spindles, manual inspection is vital to check the condition of inner grease seals; over-pumping EZ-Lube grease zerks often blows out the rear seal, saturating the electric brake shoes in grease. Contaminated brake linings cannot be cleaned and must be replaced immediately.
Electric Brake Inspections and Adjustment
Ensure both mechanical and electrical components of your drum brakes operate uniformly across all axles:
- Brake Magnet Resistance: Use a multimeter set to ohms to measure resistance across the brake magnet wires. A standard 7,000-lb axle magnet should measure between 3.0 and 3.8 ohms. Significantly higher or lower readings signal an internal coil breakdown.
- Brake Drum & Lining Wear: Inspect the brake shoe friction material. Replace the shoes if the lining thickness has worn down to 1/16 inch or less.
- Manual Star Wheel Adjustment: Adjust the manual star adjuster until the brake shoe drags lightly against the drum, then back it off 3 to 4 notches so the wheel spins freely.
- Breakaway Safety System: Jack up one side of the trailer and pull the pin from the emergency breakaway switch box. Attempt to turn the wheel by hand; the electric brake magnets should engage instantly from the trailer's onboard 12V battery power. Always reinsert the pin promptly to avoid overheating the magnet coils.
For commercial contractors looking to transport both bulk materials and skid steers, pairing a heavy-duty platform with reliable running gear is critical. If your current equipment is undersized for your hauling demands, explore our broad selection of heavy-duty dump trailers to upgrade your fleet.
Structural Integrity, Pivot Hinges, and Bed Hardware
The immense leverage exerted by hydraulic hoists subjects the main frame rails, scissor pins, and rear hinges to cyclical fatigue. Performing regular structural walk-arounds catches metal stress before it develops into catastrophic failure.

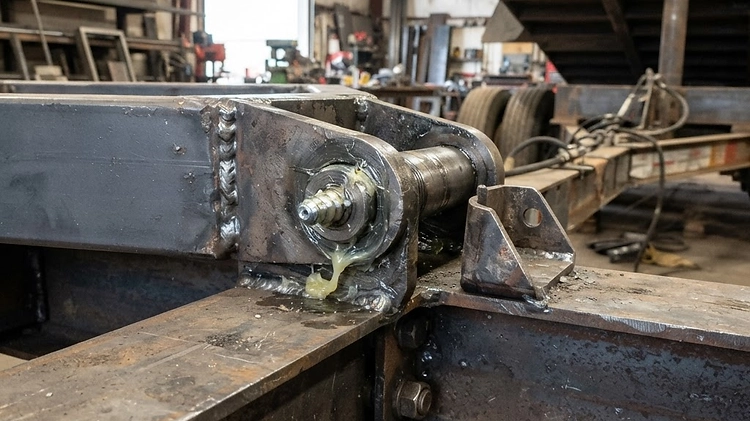
Locate every grease zerk across the hoist scissor assembly, cylinder pin brackets, and rear dump bed pivot hinges. Pump fresh lithium-complex EP chassis grease into every fitting until old, contaminated grease purges outward. Neglected hinge pins will seize or egg out the mounting sleeves, creating severe frame binding during dumping cycles. Inspect the rear double-acting spreader gates, slam latches, and side extension pockets for bending or cracked welds. Ensure safety chains, pintle rings, and coupler locking mechanisms are free from excessive play and deformation.
If your business handles diverse materials requiring both dumping and transport capabilities, having the right build configuration is essential. Mid-size contractor teams frequently rely on versatile models like the Double-A 6′ X 10′ Dump Trailer for residential driveways and tighter spaces, while heavy demolition crews step up to tandem-axle powerhouses like the Double-A 7′ X 14′ Dump Trailer w/ High Sides to haul bulk debris without spillage.
Master Maintenance Checklist Schedule
| Inspection Component | Daily / Pre-Trip | Monthly | Bi-Annually / 12,000 Miles | | :--- | :--- | :--- | :--- | | Hydraulic Fluid Level | Verify bed fully lowered; check sight glass or dipstick | Inspect fluid clarity and odor | Drain and replace ISO VG 32/46 fluid | | Hose & Cylinder Seals | Check for visible weeping or rod scratches | Check fitting torque; clean cylinder rod | Replace aging wiper/rod seals if leaking | | Battery & Terminals | Verify hydraulic lift response | Test static voltage (≥12.6V); clean terminals | Load test battery; inspect truck charge line | | Hinges & Hoist Pins | Visual check of locking pins | Grease all pivot zerks with EP grease | Inspect hinge sleeves for ovalization/wear | | Tires & Lug Nuts | Check cold PSI; inspect tread wear | Re-torque lug nuts to 100–120 lb-ft | Rotate tires across tandem axles | | Wheel Bearings & Seals | Feel hubs for excessive heat after highway run | Inspect dust caps and rear seal integrity | Repack bearings; replace double-lip seals | | Electric Brakes | Test trailer brake controller in cab | Test magnet resistance (ohms) | Clean drums; inspect shoe lining thickness | | Safety Breakaway | Inspect lanyard attachment and pin seating | Pull pin to test magnet engagement | Replace internal breakaway switch if worn |
Proper Loading and Jobsite Operating Protocols
Preventive maintenance also involves operating your equipment correctly on the jobsite. The best-maintained trailer will fail prematurely if loaded beyond rated capacities or operated carelessly.
Always distribute weight evenly inside the bed. For bulk material such as topsoil or crushed stone, center the pile slightly forward of the front axle to maintain a safe 10% to 15% tongue weight ratio. Loading material too far forward overloads your hitch coupler and truck suspension, while tail-heavy loading causes hazardous trailer sway at highway speeds. When hauling secondary equipment like mini-excavators or track loaders, position the machine to balance the center of gravity and chain it securely to integrated D-rings rather than side rail tie-offs. If your operation requires transporting heavy excavators and earthmoving attachments across regional jobsites, review dedicated equipment trailers built with heavy-duty channel crossmembers and reinforced loading ramps.
Crucially, never dump on uneven, soft, or sloping ground. When a dump box is raised to maximum angle, the trailer's center of gravity shifts upward dramatically. An off-camber angle of just a few degrees creates immense lateral twisting force that can twist the chassis or flip the entire rig sideways. Never drive forward with the bed hoisted in the air; discharge the load, lower the bed completely onto the frame bump stops, secure the gate latch, and only then reposition the vehicle.
Bottom Line
Consistent preventive maintenance transforms your dump trailer from a potential liability into an enduring workhorse that delivers decades of dependable service. By executing pre-trip hydraulic inspections, keeping electrical terminals pristine, greasing pivot pins, and adhering to strict axle service schedules, you eliminate sudden downtime and maintain peak safety on the road.
Ready to upgrade or expand your commercial fleet with high-performance hauling equipment? Visit our shop inventory or contact the team at Prime Trail Trailers in Elkhart, IN to explore top-rated dump trailers, equipment haulers, and commercial trailers configured for your toughest jobs.
Related Dump Trailer Guides
Keep your dump trailer working and sized right with these companion guides:
- What Size Dump Trailer Do I Need? Sizing, Payload & Capacity Guide — match box size and GVWR to your haul.
- Why Your Dump Trailer Won't Lift: Hydraulic & Electrical Troubleshooting Guide — diagnose a hoist that won't raise.
Shop Related Trailers
FAQ
Have Questions? We're Here to Help
Still unsure which trailer fits your needs, or need specs, pricing or delivery advice? The Prime Trail Trailers team is ready to answer your questions and help you find the right rig.