
Why Your Dump Trailer Won't Lift: Hydraulic & Electrical Troubleshooting Guide
Diagnose why your dump trailer won't lift. Follow our step-by-step troubleshooting guide covering battery voltage, pump solenoids, hydraulic fluid, and valves.
Quick Summary
Diagnose why your dump trailer won't lift. Follow our step-by-step troubleshooting guide covering battery voltage, pump solenoids, hydraulic fluid, and valves.
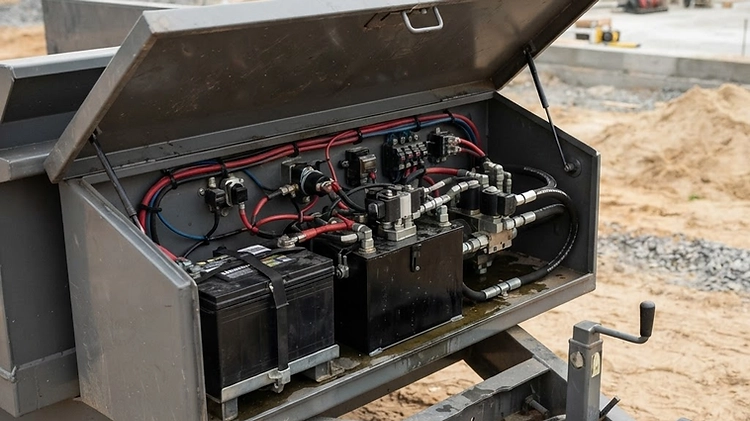
Few jobsite headaches match the frustration of arriving at a dumping site with a full payload of gravel, demolition waste, or wet topsoil, only to press your remote controller and hear nothing but a sharp click—or worse, total silence. A dump trailer bed that refuses to lift halts your entire workflow, traps thousands of pounds of material, and burns expensive billable hours. While hydraulic hoists seem complex, the underlying systems on modern commercial trailers are straightforward once you understand how the 12-volt electrical supply interfaces with the hydraulic power unit.
Whether you operate an ultra-tough commercial hauler like the 2025 Double-A 7′ X 14′ Dump Trailer or a compact residential hauler like the 2025 Universal Trailers Snake River 5′ X 10′ Tandem Axle Dump Trailer, nearly all hoist failures trace back to four primary culprits: depleted electrical voltage, a faulty starter solenoid or remote switch, hydraulic fluid deficits, or stuck directional control valves. By approaching the issue methodically rather than swapping parts blindly, you can isolate the root failure in minutes and get your trailer back in service.
Step 1: Safety Protocols for Loaded Dump Beds
Before touching a tool, multitester, or hydraulic fitting, you must acknowledge the immense gravitational energy stored in a raised or loaded dump box. Never place any part of your body beneath an elevated dump bed unless the mechanical safety support arm is fully engaged and locked in position. Hydraulic hoses can rupture instantly, and relief valves can unseat under load, dropping a multi-ton steel box in a fraction of a second.

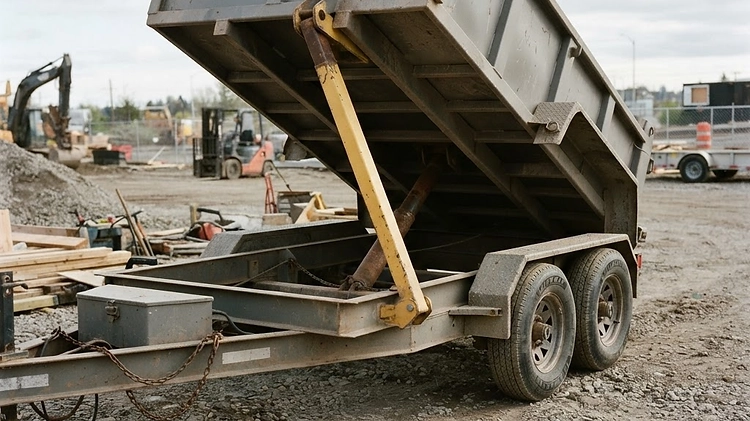
If your trailer is fully loaded and will not raise at all, do not attempt to pry, jack, or winch the box upward using external machinery. Attempting to force a loaded scissor hoist or dual-piston assembly past its mechanical geometry can bend the cylinder rods, twist the main subframe, or blow high-pressure seals. Always park the towing vehicle and trailer on firm, flat ground, chock the trailer tires securely, and keep observers clear of the perimeter before initiating electrical or hydraulic tests.
Step 2: Electrical System & Battery Diagnostics
More than 80 percent of dump trailer lift failures stem from insufficient electrical delivery. Hydraulic power packs use high-draw DC electric motors—often drawing between 150 and 250 amps under full load to generate upwards of 3,200 PSI of system pressure. When a battery is degraded or partially drained, it might provide enough power to illuminate your clearance lights or trigger an internal relay, but it will instantly collapse when asked to turn the heavy pump motor against a full bed.
Static vs. Loaded Battery Voltage
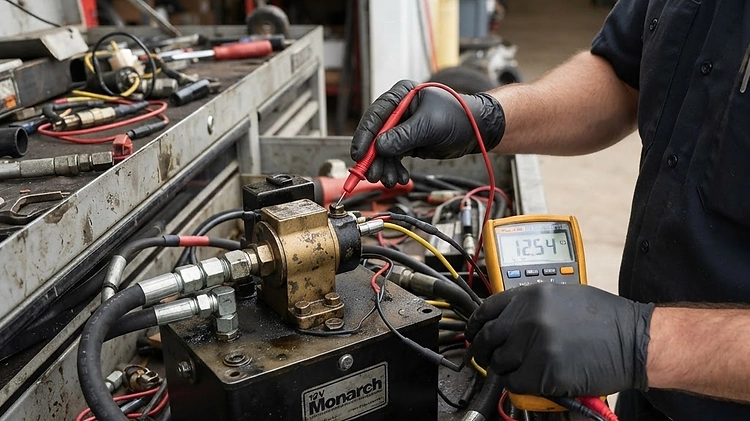
Begin your diagnosis with a digital multimeter directly across the battery terminals:
- Healthy State: A fully charged 12V deep-cycle battery reads between 12.6V and 12.8V at rest.
- Marginal State: A reading between 12.0V and 12.2V indicates a battery discharged by roughly 50 percent, which often fails under a maximum payload.
- Critical Depletion: Anything below 11.9V will generally refuse to cycle the hydraulic pump motor altogether.
However, a static voltage check tells only half the story. Place your multimeter probes firmly on the lead battery posts, press the remote "UP" button, and watch the meter display. If the voltage plunges from 12.6V down below 9.5V the moment the switch contacts engage, your battery has suffered severe sulfation, an internal cell breakdown, or extreme discharge. In such cases, the battery lacks the cold cranking amps required to run the electric motor.
Grounding and Cable Connections
High-amperage 12V circuits require pristine electrical connections. Inspect both the positive cable and the primary chassis ground strap. Road vibration, corrosive road salt, and dirt will quickly compromise terminal lugs inside the front tongue toolbox. Disconnect your terminals, wire-brush the contact surfaces down to bare metal, apply a protective coating of dielectric grease, and re-torque the hardware snugly. A loose ground wire causes high electrical resistance, generating heat and preventing adequate amperage from reaching the starter solenoid.
Step 3: Starter Solenoid, Pendant Remote, and Fuses
If your battery holds a robust 12.6 volts under load but the hydraulic pump motor refuses to spin, the failure lies within the control circuit. This control loop consists of the in-line fuse or circuit breaker, the push-button handheld pendant, and the heavy-duty pump solenoid mounted directly to the hydraulic power pack.

Testing the Handheld Remote
Dump trailer remotes endure harsh treatment on job sites—getting stepped on, caught in tailgate latches, or dropped in mud. Most commercial remotes use a three-wire or four-wire lead connected via an industrial plug to the pump housing. Unscrew the pendant casing to inspect the internal microswitches. Look for broken wire leads, water intrusion, or corrosion across the switch contacts. You can verify the remote's functionality by bridging the incoming 12V power pin directly to the "UP" signal terminal using a jumper wire; if the pump engages immediately, your remote cord or rocker switch is broken and requires replacement.
Testing the Starter Solenoid
The starter solenoid acts as an electromagnetic relay, bridging the main battery cable to the electric pump motor when signaled by the pendant. Diagnosing this component takes less than two minutes with a basic test light or meter:
- Place your meter on the small control post of the solenoid and activate the "UP" button. You should read 12V+. If no voltage appears, your fuse is blown or the remote wire is open.
- If 12V is present at the small post and the solenoid produces an audible "click," test the large output post leading into the starter motor. It should immediately read identical to battery voltage.
- If you measure 12.6V on the input lug, hear the solenoid click, but measure 0V on the output terminal leading to the motor, the internal copper contact plate inside the solenoid has burned out. Replace the solenoid with an exact continuous- or intermittent-duty marine/industrial unit.
For contractors operating severe-duty equipment like our 2025 Double-A 8′ X 16′ Tandem-Dually Gooseneck "Work Horse" Dump Trailer or heavy deckover-trailers, carrying a spare continuous-duty starter solenoid in your truck toolbox is inexpensive insurance against unexpected downtime.
Step 4: Hydraulic Reservoir Levels and Fluid Conditions
When the electric motor spins with full vigor and sounds healthy, yet the hoist cylinder creeps upward a few inches and stalls, the issue is almost certainly hydraulic. The hydraulic pump cannot generate fluid pressure if it draws air into the intake galleries.
Measuring Hydraulic Fluid the Correct Way
A critical maintenance mistake is checking fluid while the bed is raised. You must always measure hydraulic oil with the dump bed fully lowered in the flat, resting position. When a single-acting or double-acting cylinder extends, fluid is evacuated from the reservoir tank to fill the cylinder barrel. If you top off the oil reservoir while the bed is propped open, the tank will violently overflow through the breather cap when the hoist retracts, coating your electrical box and wiring harnesses in oil.
Lower the box, clean the exterior of the reservoir cap to prevent contamination, and inspect the fluid level via the dipstick, sight gauge, or reservoir fill line. If low, add clean fluid of the correct viscosity.
| Fluid Type | Recommended Operating Temperature Range | Typical Commercial Application | | :--- | :--- | :--- | | ISO AW32 | 0°F to 90°F (-18°C to 32°C) | Standard year-round use; ideal for northern climates & winter operation | | ISO AW46 | 30°F to 110°F (-1°C to 43°C) | Heavy commercial use in southern climates; severe summer duty cycles | | ATF (Dexron III) | -20°F to 100°F (-29°C to 38°C) | Specified by select manufacturers for sub-zero climates & fast response |
Note: Never mix hydraulic fluid types or add universal tractor fluids unless verified by your manufacturer specifications. For broader preventative care guidance, review our comprehensive Dump Trailer Maintenance Checklist: Hydraulic, Electrical & Structural Inspection Guide.
Bleeding Trapped Air
Air trapped within hydraulic lines causes the hoist to act jerky, hesitate during initial extension, or produce white, foamy oil in the reservoir. On systems powering large commercial platforms like the 2025 Double-A 8′ X 16′ Tri-Axle Deck-Over Dump, trapped air can prevent the cylinder from reaching maximum lift angle. To purge air from a standard self-bleeding KTI or Bucher power unit, ensure the reservoir is properly filled, disconnect any payload, and cycle the bed fully upward and downward through three continuous strokes, pausing 10 minutes between cycles to let aeration dissipate in the tank.
Step 5: Mechanical Hoist, Valves, and Overload Limitations
If both your electrical components and hydraulic fluid levels pass inspection, the final mechanical and hydraulic controls must be isolated.

The Pressure Relief Valve and Bed Overloading
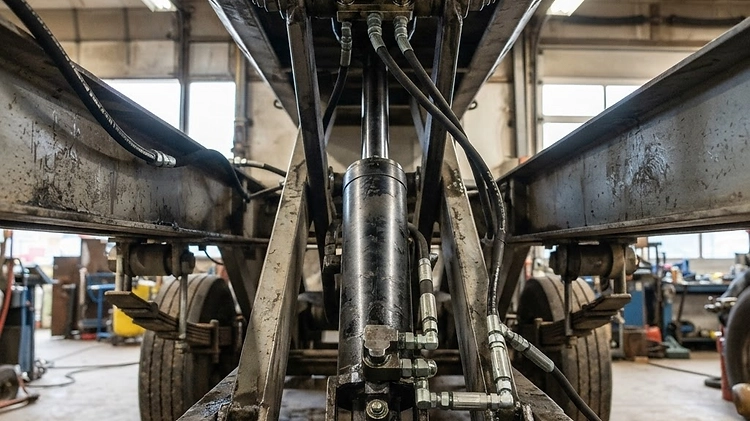
Every commercial dump trailer power unit incorporates an adjustable, factory-calibrated internal pressure relief valve—typically set between 2,800 and 3,200 PSI. If the hydraulic pressure required to elevate the box exceeds this threshold, the relief valve opens, bypassing oil directly back into the reservoir to prevent cylinder rupture or subframe failure. When this happens, the electric motor will whine loudly under heavy load, but the cylinder will not budge.
Before assuming your hydraulic valve is damaged, calculate your actual payload. Wet sand weighs up to 3,000 lbs per cubic yard, while crushed limestone can exceed 2,700 lbs per yard. Loading an 8-yard or 10-yard box to the brim with dense aggregate will easily overwhelm the payload limit of a tandem 7,000-lb axle trailer. For commercial contractors evaluating payload thresholds, check out our in-depth resource: What Size Dump Trailer Do I Need? Sizing, Payload & Capacity Guide.
If the bed refuses to lift even when completely empty, debris may have lodged in the pressure relief valve seat, allowing oil to recirculate without building pressure. Disassembling, inspecting the O-rings, and cleaning the internal valve cartridge with solvent often cures the problem immediately.
Manual Lowering Valves and Lowering Solenoids
On double-acting power units (power up and power down) or single-acting systems (power up and gravity down), an electromagnetic directional cartridge valve directs fluid flow. If the 12V coil on the lowering valve shorts out or receives constant stray voltage from a pinched wire, the valve will stick wide open. Under this condition, the pump pushes oil straight through the open exhaust port into the reservoir instead of pressurizing the cylinder piston. Remove the coil stem, clean the needle valve assembly, and verify the cartridge moves freely against its internal spring.
Scissor and Cylinder Pivot Greasing
Mechanical binding is another common yet overlooked issue. A standard scissor hoist or telescopic front-mount piston creates massive torsional force across heavy steel hinge pins. If these pivot bushings are run dry without regular chassis grease, friction increases exponentially under load. In extreme cases, a dry, galling hinge pin can seize entirely, mechanically locking the dump bed to the main trailer chassis and triggering the hydraulic relief valve.
Troubleshooting Flowchart: Diagnostic Action Steps
When you are stuck in the field, run through this rapid diagnostic sequence to isolate your trailer's hoist failure without guessing:
- Press Remote and Listen:
- No sound: Check the master battery disconnect switch, inline 15A/20A control fuse, battery terminals, and pendant remote wiring.
- Rapid click, no motor spin: Battery voltage is dead under load, ground wire is loose, or starter solenoid contacts are fried.
- Motor whines, no bed movement: Check oil level in reservoir tank, verify manual lowering valve knob is fully closed, inspect for disconnected quick-couplers, or reduce payload weight.
- Inspect the Physical Cylinder:
- Check the chrome cylinder rod for scoring, gouges, or severe oil dripping past the gland nut.
- Verify that both lower and upper pivot pins are lubricated and that the mechanical safety prop is fully disengaged.
- Assess Charging Infrastructure:
- The auxiliary pin on a standard 7-way truck plug delivers only 3 to 7 amps under ideal conditions—insufficient to recharge a dump battery between back-to-back dump cycles. Install a dedicated DC-to-DC onboard charger, solar tender panel, or 2-gauge quick-connect charging harness run directly from the truck alternator.
If your daily operations involve hauling skid steers or excavators alongside materials, pairing your fleet with versatile equipment platforms—such as heavy-duty equipment-trailers or tilt-trailers—can reduce unnecessary wear and tear on your dedicated dumping boxes.
The Bottom Line
A dump trailer that refuses to raise almost never requires a complete system overhaul. In the vast majority of cases, the culprit is a discharged 12V marine battery, loose grounding cable, failed starter solenoid, or low hydraulic fluid level in the reservoir tank. By working through electrical voltage, solenoid circuits, fluid capacity, and mechanical release valves in a structured order, you can pinpoint and solve the failure quickly without unnecessary downtime.
Looking to upgrade your hauling fleet with dependable, heavy-duty commercial equipment? Explore our complete inventory of premium dump-trailers or visit the Prime Trail Trailers shop in Elkhart, IN to find the perfect trailer engineered for years of hard-working reliability.
Shop Related Trailers
FAQ
Have Questions? We're Here to Help
Still unsure which trailer fits your needs, or need specs, pricing or delivery advice? The Prime Trail Trailers team is ready to answer your questions and help you find the right rig.
Prime Trail Trailers
Prime Trail Trailers is a family-owned trailer dealer in Markle, Indiana, stocking utility, dump, enclosed, equipment, car hauler and gooseneck trailers with nationwide delivery. This guide is based on what our customers ask us most and the trailers we sell every day.
More about Prime Trail Trailers