
Trailer Wiring and Electrical Troubleshooting: Fixing Dead Lights and Bad Grounds
Learn how to diagnose and fix common trailer wiring issues, from dead lights to bad grounds, with our comprehensive electrical troubleshooting guide.
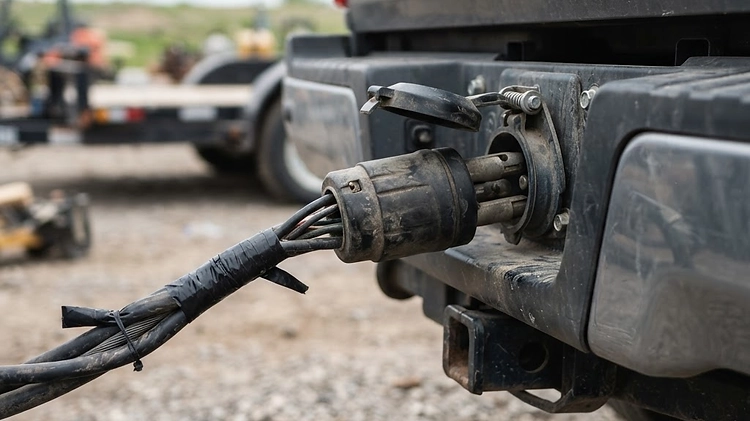
There is nothing more frustrating than plugging in your trailer, walking to the back, and finding dead lights or a malfunctioning brake system. Trailer wiring leads a hard life exposed to weather, road debris, and constant vibration, making electrical faults the most common maintenance issue owners face. This comprehensive guide will walk you through diagnosing and fixing trailer wiring problems so you can tow safely and legally.
Why Trailer Wiring Fails (and How to Prevent It)
Trailer electrical systems are relatively simple, but they operate in a harsh environment. The primary culprits for wiring failures are corrosion, physical damage, and poor grounding. When you are hauling a 16-foot dump trailer through a muddy job site in Texas, moisture and dirt inevitably work their way into connectors and splices.
To prevent premature failures, always use heat-shrink butt connectors rather than standard crimp connectors, which allow moisture to enter and corrode the copper wire. Additionally, packing your 7-way or 4-way plugs with dielectric grease creates a waterproof barrier that keeps the pins clean and ensures a solid connection every time you hitch up.
Essential Tools for Trailer Electrical Troubleshooting
You do not need to be a master electrician to fix trailer wiring. A basic diagnostic kit will cover 95% of the issues you encounter on utility trailers and heavy-duty haulers alike.
The Diagnostic Kit
- Digital Multimeter: Essential for checking 12V DC power and testing continuity across long wire runs.
- 12V Test Light: The fastest way to check for power at the plug or light fixture. Simply ground the clip and probe the wire.
- Wire Strippers and Crimpers: For cleanly cutting damaged wire and installing new terminals.
- Heat-Shrink Connectors: Mandatory for waterproof repairs.
- Dielectric Grease: To protect all exposed connections from the elements.
The 7-Way and 4-Way Plug: Pinouts and Common Issues
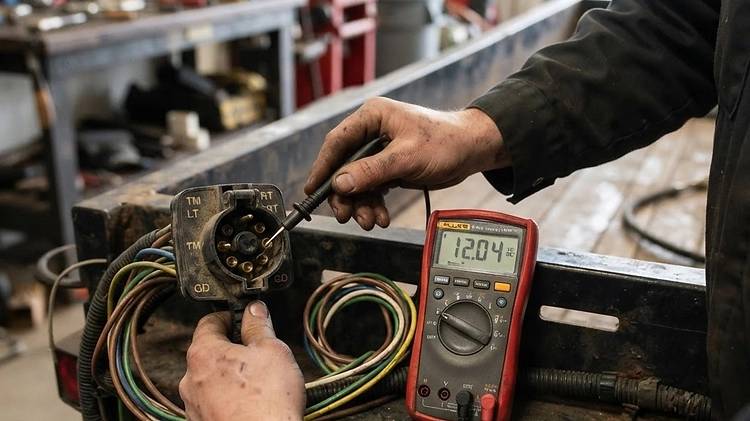
Understanding your trailer's plug is the first step in troubleshooting. The 4-way flat plug is standard on smaller trailers without brakes, providing ground, running lights, left turn/stop, and right turn/stop. The 7-way round RV-style plug adds a 12V auxiliary power line, electric brake control, and reverse lights.

When a specific function fails, start by testing the corresponding pin on the tow vehicle's receptacle. If the tow vehicle has power but the trailer does not, the issue is in the plug, the wire run, or the fixture itself. A loose or corroded plug is a frequent issue, especially for hotshot drivers running routes out of Dallas who constantly connect and disconnect their rigs.
Diagnosing Dead Trailer Lights and Bad Grounds
If you take one thing away from this guide, let it be this: the ground connection is the single most important part of your trailer's electrical system. A bad ground can cause lights to flicker, function intermittently, or cause the wrong lights to illuminate (like a turn signal making all the running lights flash).
The Grounding Rule
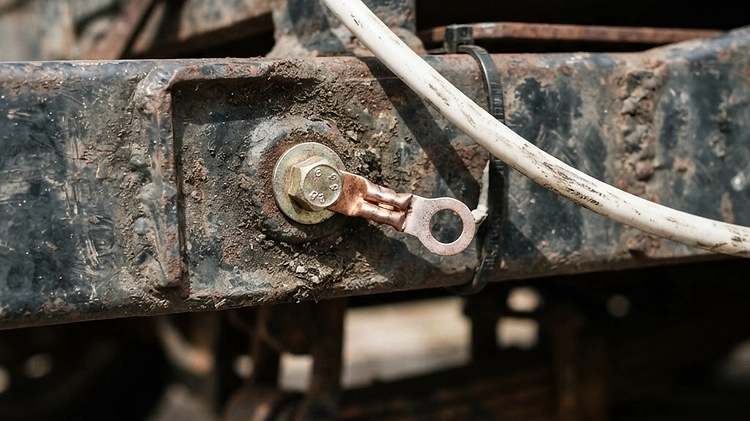
Most trailers use the steel frame as the ground path. The main ground wire from the plug must be securely bolted to bare metal on the trailer tongue. Over time, rust and corrosion degrade this connection. If you have multiple lights acting erratically, unbolt the main ground, wire-brush the frame to shiny metal, reattach the ring terminal, and coat it in dielectric grease.
For a complete maintenance routine, pair your electrical checks with our Annual Trailer Inspection Checklist and our Trailer Wheel Bearing & Axle Maintenance Guide.
Troubleshooting Electric Trailer Brakes and Breakaway Systems
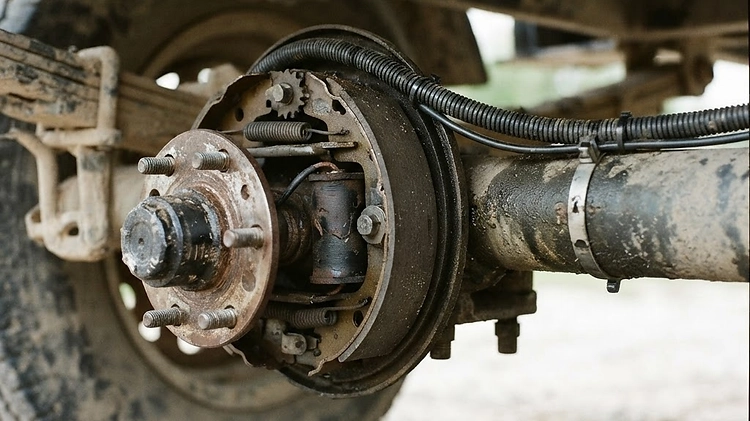
Electric brakes require a solid 12V signal from the brake controller and a perfect ground to actuate the electromagnets inside the drums. If your brakes feel weak or grab unevenly, inspect the wiring running along the axles. Road debris often snags these exposed wires.

Your breakaway system is a critical safety component that applies the trailer brakes if it disconnects from the tow vehicle. The system relies on a small 12V battery mounted on the tongue. Test this battery regularly; if it drops below 12 volts, it cannot engage the brakes. For more on heavy-duty systems, see our Dump Trailer Maintenance Checklist and learn Why Your Dump Trailer Won't Lift.
Key Specifications: Wire Gauges and Functions
Using the correct wire gauge is vital to prevent voltage drop, especially on long dump trailers or enclosed car haulers.
- Ground Wire (White): 10 AWG (Must handle the total current of all systems)
- Brake Wire (Blue): 10 or 12 AWG (Requires high current for the magnets)
- 12V Auxiliary (Black): 10 or 12 AWG (Charges the breakaway or dump battery)
- Turn/Stop Lights (Green/Yellow): 14 or 16 AWG
- Running Lights (Brown): 14 or 16 AWG
Bottom Line
Trailer wiring does not have to be a mystery. By maintaining clean, tight connections, ensuring a solid frame ground, and using waterproof heat-shrink connectors for repairs, you can eliminate the vast majority of electrical headaches. Whether you are hauling livestock (check out our Livestock Trailer Sanitation & Maintenance Guide) or moving equipment in Florida, reliable lights and brakes are non-negotiable.
Ready to upgrade to a reliable new rig? Explore our full inventory at the Prime Trail Trailers Shop or check out our 7x14 Tandem Axle Utility Trailers for a dependable hauling solution. For more expert advice, visit our Guides Hub.
Shop Related Trailers
FAQ
Have Questions? We're Here to Help
Still unsure which trailer fits your needs, or need specs, pricing or delivery advice? The Prime Trail Trailers team is ready to answer your questions and help you find the right rig.